
Why Is Your Glass Beverage Dispenser Leaking at the Spigot?
A glass beverage dispenser usually leaks at the spigot because a gasket is out of position, the fitting is loose, or liquid is escaping through the valve itself. Start by finding exactly where the water appears. A drip from the nozzle calls for a different repair from a wet ring around the hole in the glass, and tightening the mounting nut will not fix every leak.
Empty the dispenser before loosening any parts. Then clean and dry the outside, add a small amount of water, and watch the spigot without operating it. A dry paper towel held against individual joints can reveal the first place moisture appears. Once you know the source, drain the water again before disassembling the fitting.
Find the first point where water escapes
Water follows the underside of a spigot and collects at the lowest point, so the visible drip is not always directly below the defect. Trace the moisture back toward the glass and look at each connection in turn.
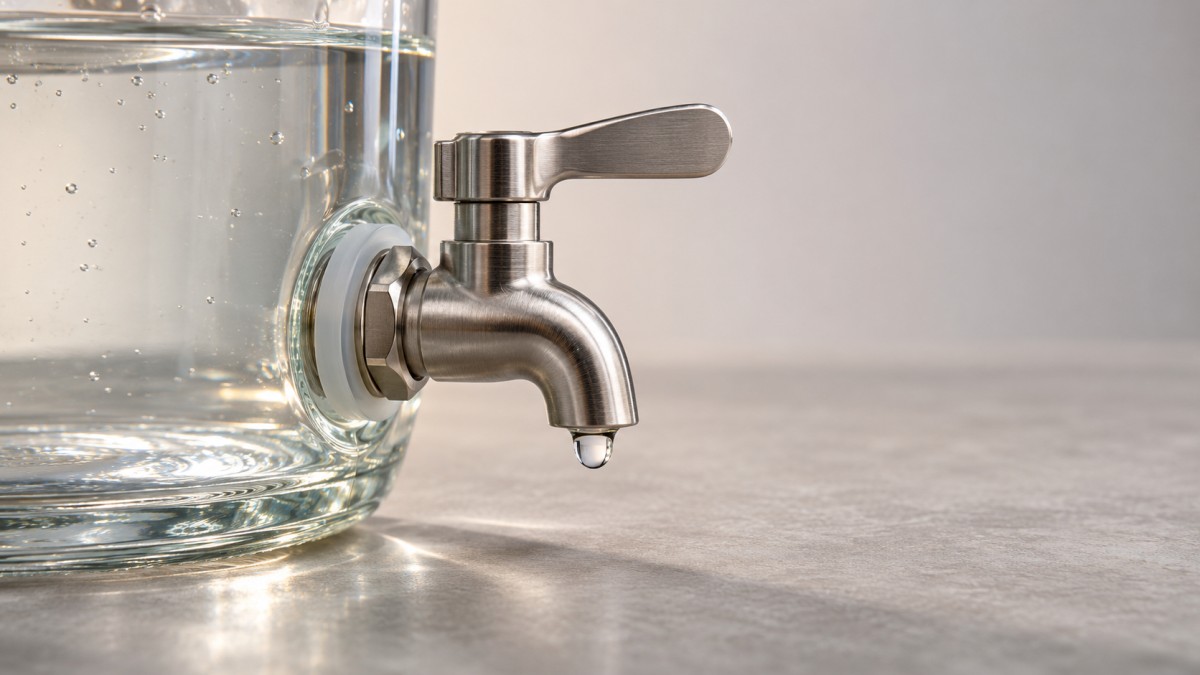
- A wet ring around the glass opening: The mounting gasket may be misplaced, damaged, dirty, or unevenly compressed. A loose mounting nut can produce the same symptom.
- Water at a joint in the spigot body: A threaded connection or an internal seal in the spigot assembly may be leaking. Dry the fitting and inspect the joint closely before taking it apart.
- A drip from the outlet with the handle closed: The valve is not sealing fully. Fruit pulp, a displaced internal seal, or wear inside the mechanism is more likely than a problem with the mounting gasket.
- Moisture below the fitting but no obvious leak at the spigot: Look for water running down from the lid, condensation on a cold dispenser, or a crack extending from the mounting hole.
If the leak appears only when the handle is pressed, operate the valve while watching the handle stem and the joints in the body. A small amount left inside the nozzle can drip after the handle is released; continued dripping after that residual water has drained points more strongly to a valve that is not closing properly.
Reseat the spigot and its gaskets
The seal at the glass depends on clean, flat contact around the opening. Even a thin piece of fruit, a twisted washer, or a ridge of dried drink can leave a path for liquid. Tightening the nut against that obstruction may simply deform the gasket.
- Empty the dispenser, remove the lid, and place the vessel on a stable, padded surface. Support the spigot as you loosen the mounting nut from inside; do not let the fitting twist against the glass.
- Remove the parts in order and note their orientation. A photograph before disassembly is useful, especially if the spigot has different washers inside and outside the vessel.
- Wash the area around the hole and the removable parts with warm water and mild dish soap. Rinse away residue and inspect the glass and sealing surfaces under good light.
- Put the parts back in the arrangement specified for that spigot. Seat each gasket flat against its intended surface, keep the outlet upright, and tighten the nut by hand until the assembly is snug.
- Add water below the fitting first, dry the area again, and then raise the water level above the spigot. Watch the joint before filling the dispenser further.
Gasket arrangements vary. Many dispensers use a soft washer on each side of the glass, while others use a different combination of seals and rigid washers. A rigid washer is not automatically a substitute for a flexible gasket, and adding extra washers can stop the nut from engaging correctly. Follow the fitting’s instructions if they are available; otherwise, preserve the original order when the assembly comes apart.
The nut should hold the spigot firmly without crushing the seal. If water seeps around the hole after hand tightening, drain the vessel and make a small adjustment. Hold the spigot steady while tightening so the gasket does not turn or bunch up. Avoid forcing a wrench against the nut: excessive pressure can distort the seal or damage the glass.
Recognize a gasket that needs replacing
A serviceable gasket should sit flat and remain flexible enough to conform to the sealing surfaces. Replace it if it is split, permanently flattened, hardened, torn around the center, or swollen so that it no longer seats correctly. A washer that looks intact but has a deep crease can also leak when compressed.
Match the replacement to the spigot assembly, not just the hole in the glass. The inner diameter must fit the threaded shank without stretching or bunching, and the outer diameter must cover the sealing area. Thickness matters too: an overly thick gasket can leave too little thread for the nut, while a very thin one may fail to accommodate the shape of the mating surfaces.
Choose a gasket intended for contact with beverages and suitable for the temperatures the dispenser is designed to hold. Materials such as silicone are used for these seals, but material name alone does not establish the suitability of an unidentified part. If the correct washer is unavailable, replacing the complete compatible spigot assembly may be more reliable than improvising with a household washer.
When the nozzle keeps dripping
A closed spigot relies on an internal valve and seal. Sticky drink residue, seeds, tea leaves, or pulp can prevent the valve from reaching its seat. Empty the vessel and clean the spigot according to its design. If the valve can be dismantled, note the order of its parts, wash the accessible surfaces, and rinse thoroughly. Work the handle through its full movement to clear residue from the sealing area.
Do not force a sealed or nonserviceable valve apart. If cleaning does not stop a continuous drip, inspect any accessible internal seal for wear or deformation. A handle that does not return fully can also leave the valve slightly open; check that it moves freely and that no part is catching on the dispenser or stand.
Some spigots have a removable cap or bonnet around the handle. A leak from that area during dispensing may indicate a loose connection or a worn stem seal. Tighten only as the fitting’s instructions allow, and replace a damaged seal if the assembly is designed to accept one. If the valve body is cracked or its internal parts cannot be serviced, replace the spigot.
Threads, sealant, and leaks between metal parts
A threaded joint can leak even when the connection at the glass is dry. First determine which parts are meant to seal against each other. Threads that simply hold a spigot to the vessel often rely on a gasket at the glass; wrapping those threads with tape will not repair a dirty or damaged gasket.
Other assemblies include threaded joints that are designed to seal on the threads themselves. Follow the spigot instructions for those connections and use only a sealant appropriate for drinking-water or beverage contact and the intended temperature. Keep loose tape or sealant out of the liquid path, and avoid applying it where it could prevent a gasket from seating.
If a joint will not screw together smoothly, stop and inspect it. Cross-threading, damaged threads, and mismatched parts can create a persistent leak and make later removal difficult. Start the connection by hand and keep the parts aligned; do not force them together to compensate for an uncertain fit.
Inspect the glass before refitting
Examine the edge of the mounting hole after removing the spigot. A chip, crack, or rough damaged area can prevent even compression and may worsen when the nut is tightened. A fine crack can be difficult to see when the vessel is wet, so dry the glass and inspect both sides of the opening in good light.
If the glass is cracked, stop using the dispenser for liquids and do not attempt to solve the leak by tightening the fitting or applying household glue. A patch around a stressed mounting hole is not a dependable way to restore the vessel. Replace the vessel or the complete dispenser as appropriate. If you are uncertain whether a mark is a crack, avoid loading the area until it has been assessed.
Test under serving conditions
A fitting that stays dry with a shallow amount of water can start seeping when the dispenser is fuller, because more liquid above the spigot puts greater pressure on the seal. After the initial test, fill the dispenser gradually to its normal level with water. Leave it on a dry surface and look again around the gasket, spigot body, and outlet. Operate the handle several times, then check for a sustained drip after releasing it.
Keep the vessel level and support its weight on the base, not on the spigot. A fitting pressed against the edge of a table or pulled sideways by a heavy container can disturb an otherwise sound seal. If the dispenser sits on a stand, make sure the outlet has enough clearance for normal use.
After a successful water test, empty and dry the outside before adding the beverage. For drinks containing fruit or herbs, keep pieces away from the valve opening where practical. If a leak returns only with a particular drink, inspect the valve for trapped solids and sticky residue before changing the mounting hardware.
Popular Tags
Kitchen Industry Research Team
Dedicated to analyzing emerging trends and technological shifts in the global hospitality and foodservice infrastructure sector.
Industry Insights
Join 15,000+ industry professionals. Get the latest market trends and tech news delivered weekly.
No spam. Unsubscribe anytime.


Contact With us
Contact:
Anne Yin (Ceramics Dinnerware/Glassware)
Lucky Zhai(Flatware)